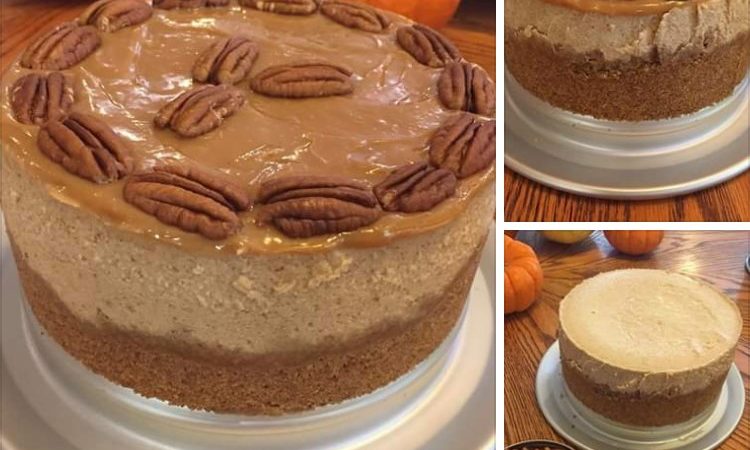

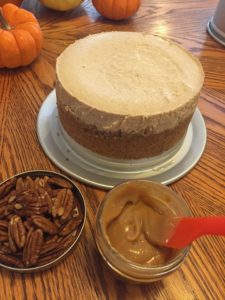
It’s pumpkin season!! Take a look at this Pumpkin Caramel Pecan Cheesecake!
Super simple, just follow these steps to make this masterpiece. Get fall-ready with this favorite. Please read this post all the way through before beginning, and make sure to check out my NOTES at the bottom! This is super simple as long as you know what steps you need to take. I think of this as a 3-step Pumpkin Cheesecake, and here’s why:
1. The first step is making Pumpkin Puree . Of course you can always just buy a can of the puree, but with how simple it is to make in the Instant Pot it’s really a must, especially if you want that rich flavor! You can learn How to make Pumpkin Puree here.
2. The second step is making this Pumpkin Caramel Pecan Cheesecake following the directions below.
3. The third step is Making the Velvety Caramel to top this with! of course, you could take another shortcut here and melt some caramels in the microwave- trust me, when I say that making this in your Instant Pot will not disappoint!
Yum!! Here’s how to do it..
For the crust:
Gingersnaps (Can use gluten free to make this gluten free!)
2 tsp. Sugar
1 tsp. of Orange or Lemon Peel Zest.
2 Tbsp. Melted Butter
Blend the crackers and sugar in a food processor and then add the butter. Shape into a crust at the bottom of a 6×3 Springform pan. Allow the cookies to go up the sides of the pan by about an inch. Set pan aside in the freezer, while you prepare the filling.
For the filling:
2 softened packages of Cream Cheese
½ cup of Pumpkin Puree
¼ cup Chopped Pecans
1 Tbsp. Flour (you can skip if you’re doing the Gluten Free version)
2 tsp. Instant Pot Vanilla Extract
½ Cup Sugar
2 tsp. Cinnamon (more if you’re like me!)
¼ tsp. each of Nutmeg, Ginger & Cloves
¼ Cup Heavy Whipping Cream or Heavy Cream
2 room temperature eggs & one egg yolk
I use my food processor again for the filling. Mix the first 7 ingredients well and then add the cream. I’ve also used milk when I was out of cream and it worked fine, so don’t stress. If you are making a gluten free version and have skipped flour, you will likely need less cream. Next you will add in the eggs, be very careful not to over-mix the eggs! This is vital! The eggs will not look fully combined for this step.
Bringing it all together: Bring the pan out of the freezer, add the filling to the pan with the crust in it and cover with a paper towel and then foil. You will put 1.5 cups of water in the Instant Pot, and then lower the pan into the Instant Pot onto the trivet using a sling and bake in the pressure cooker on high pressure for 30 minutes, with a 20 minute Natural Pressure Release. When it comes out, uncover it and make sure there’s no water on top of the cheesecake- if so, gently blot it dry with a paper towel. If it comes out and the middle isn’t set, you can bake for an additional 5-10 minutes until it is set. Remember, it will go in the refrigerator for at least 4 hours, overnight is recommended.
Oven Directions: If you don’t have a pressure cooker, just cover it with foil only and bake in a hot water bath for about 1.5 hours until the center is almost firm and then remove to cool. Always cut the outer edge before it cools so that the cheesecake is less likely to crack when it cools.
Notes: I had roasted a whole pumpkin in the IP on steam setting a couple days earlier, so I had the leftover pumpkin ready to go before starting this. Here’s how to make pumpkin puree in the Instant Pot in about 10 minutes!
Instead of using the common 7-inch pan, I use a 6-inch Fat Daddio’s Spring Form Pan to get a taller cake.
You basically are going to cover the pan with foil and then use a sling, or make one out of foil so that you can lower the pan into the pressure cooker and get it out easily. You can purchase a silicon trivet and sling like this one.
I recommend using a paper towel and then foil to cover the cheesecake, as other cheesecake recipes have said, because this protects it more from the condensation. Condensation is the cheesecake’s worst enemy! I also recommend doing the full Natural Pressure Release so that the middle is completely set. This does not cause it to crack! Before switching to a plastic wrap cover and putting it in the fridge to cool overnight, I carefully run a knife around the outside of the cheesecake to loosen it from the edges so that when it cools it wouldn’t crack.
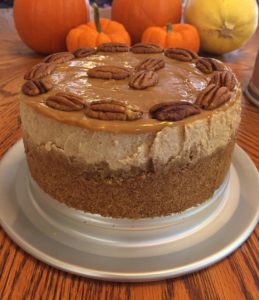
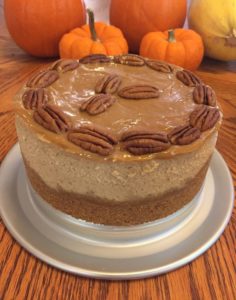
Please don’t take the easy way out by melting caramels in the microwave like most recipes ask, instead follow the directions in my Dulce De Leche (Caramel) Post here and make your own! Once the cheesecake was ready to go into the fridge overnight, I used the IP to cook the Caramel for 50 minutes with a Natural Pressure Release. I did not decorate with the caramel and pecans until it was time to serve. I chose to spread out the caramel and then top it with whole pecans over the top but chopped pecans over the whole top looks good too! I would love to hear how you like this recipe and what you did to make this in the comments below! enjoy!
Here are some helpful links:
